In this project we had to design a tiny house that was comfortable in all weather conditions with little to no use of electricity. We had to learn about how different materials are affected by heat, what kind of materials we should use, how to get light into the building, how do we heat water for our tiny house, and finally where the house should be located.
Water Heater
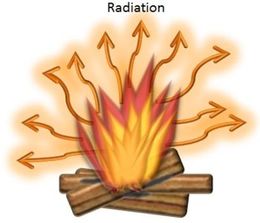
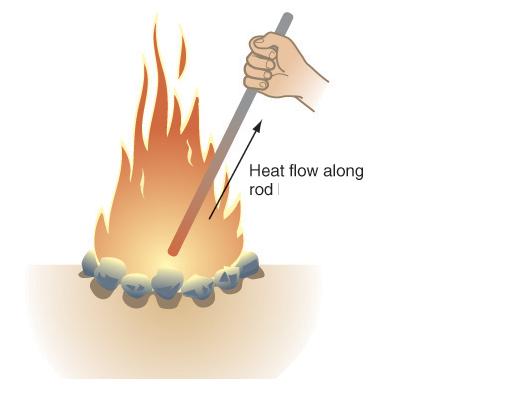
We first had to design an effective water heater. We learned about radiation, convection, and conduction currents. Radiation waves is heat transfer via rays, the heat produced by the sun is moved through space by radiation waves to get to Earth to heat the water. Convection currents is when heat is transferred through a liquid. This was effective to keep the water hot. Finally, we learned about conduction currents, this is when heat is transferred through a solid; we used metal because it is a high thermal conductivity material.
|

|
|
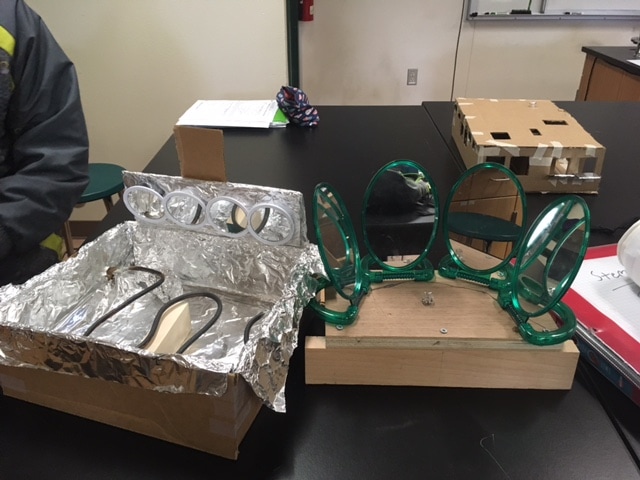
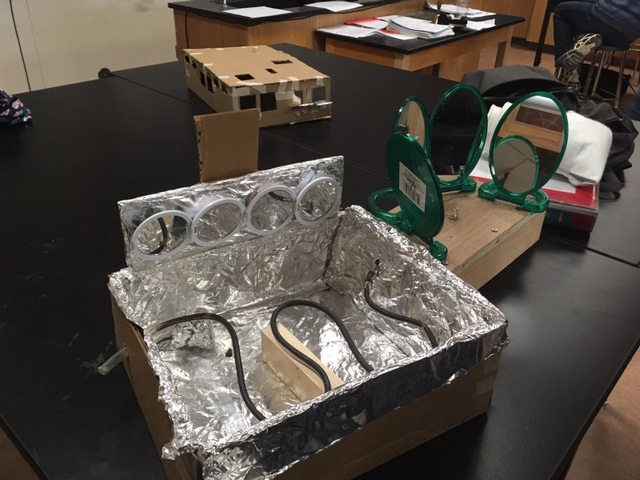
We made a water heater where the light hit the mirrors to make the water warmer. By having mirrors around the water bottle it created convection currents which helped heat up the water. From there, it traveled through the plastic tube to get to the copper pipe which then heated up more due to the reflection of light and insulation inside the cardboard box to keep the heat in. The reflected light in the water bottle and pipe created conduction. All sources of heat are coming from the sun. By using this design we were able to raise the temperature of the water from 16 degrees Celsius to 19 degrees Celsius in 20 minutes. With this design we had to use 376.48 J of energy to receive a heat gain of 3 degrees.
|
|
Solar Angles
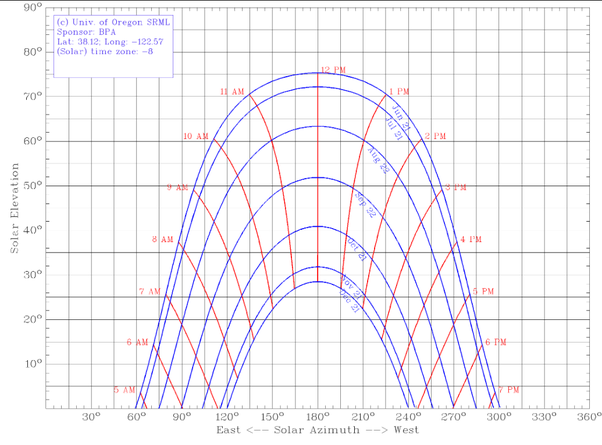
The next step in this project was to discover solar angles and how it changes during the seasons. We learned that vertical light (90 degrees) is concentrated and bright, slanted light is less concentrated because it takes up a larger area and, therefore, the light is dimmer. The Earth tilts on its axis as the seasons change. In Novato, California the highest angle of the sun in the shortest day is about 30 degrees and the highest peak of sun in the summer is approximately 75 degrees, but the angles vary depending on the line of latitude you live on. This was important because we wanted to get light and heat in our house during the winter months and out of the house in the summer months. The diagram below shows the different angles of the sun at different times of the day and year.
Material Heat Lab
Before we designed and blueprinted our tiny house we had to test materials to use for our project. We had to design and conduct an experiment to test all possible materials the we might use in the interior and exterior of the house. We did this so we could better insulate our house depending upon where it was located. Some of the materials we tested were flooring materials, exterior walls, interior walls, roofing, and insulation. In the construction of the tiny house we wanted to use materials that had a high specific heat capacity because it would better regulate the temperature of the house.
Specific heat is how much heat an object can take in, in a given amount of time. An object with a high specific capacity is one that slowly takes in heat and releases it, this means it has a stable temperature. An example of this is water because it takes a while to heat up and cool down. An object with a low specific heat capacity is one that heats and cools quickly. An example of this is tin foil because it heats and cools quickly and it does not have a stable temperature.
Our group was specifically assigned to focus on which was the best insulator for the walls, while other groups in our class tested different materials. The data we collected concluded that the best insulator for our experiment was fiberglass foam. In this experiment we were testing which material would be the best insulation material to use inside of our tiny house. In the experiment we heated pieces of metal to 240 degrees Fahrenheit, we then placed the metal in a box lined with the insulating material and closed the box. We ran the experiment for ten minutes, after the ten minutes we took a final reading of the metal and the metal that had the highest temperature was concluded to be the best insulated. The materials that we tested were spray foam, rigid insulation, fiberglass foam, cotton, carpet cushion, and carpet.
In this experiment the fiberglass foam performed the best because our final temperature reading was 107 degrees Fahrenheit which was the highest final temperature. This was because the fiberglass foam had many air pockets in it so it was able to hold and retain a lot of the heat that was given off from the metal keeping it hotter longer. The lowest final reading was from the cotton which was 82 degrees Fahrenheit. The cotton had this result because it had less major air pockets causing it to only retain very little heat that the metal produced. With this data we were able to conclude that fiberglass foam was the best insulator that we tested. In conclusion the material that has a lot for air pockets will be able to insulate objects better because it can hold more heat inside a contained area, therefore, keeping the contained area warmer.
Our analysis of the overall class experiment was: A quick temperature change indicates a low specific heat capacity meaning that the material heats and cools quickly. These kinds of materials would be good for a roof because it would reflect unwanted heat in the summer and insulate the house in the winter. A slow change in temperature means that it has a high specific capacity causing the material to heat and cool slowly. This material has a stable temperature and can contain large amounts of heat for a long time and release the stored heat when the air around it gets cooler. Materials with a high specific heat capacity would be good for walls because it will keep the room around it at the same relative temperature. Possible errors that we had in our experiment were that we had different sizes of materials, and inconsistent amounts of time that we tested the materials. The different-sized materials could potentially have an effect on how much heat an object could possibly hold. Ways that we could improve the lab is to run the experiment longer than twenty minutes. Ideally, we should have ran the experiment for a longer period of time because the materials would be exposed to heat and light much longer than the twenty-minute experiment. We should have regulated the timing so that every thirty seconds someone would need the thermometer instead of having the timers going off so close to each other as it causes an inaccurate measure in temperature. In further experiments we could account for seasonal change because the light will be at different angles. We could also conduct another experiment to see how different materials would react to rain and extreme weather because that will also have an effect on what materials we would use to build our house.
Day Lighting Design and Techniques
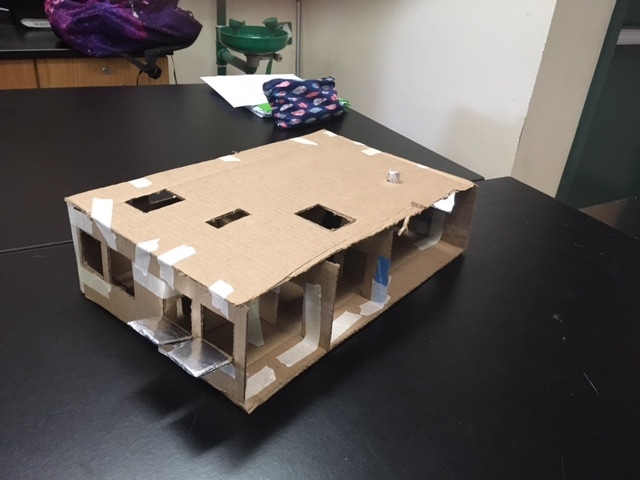
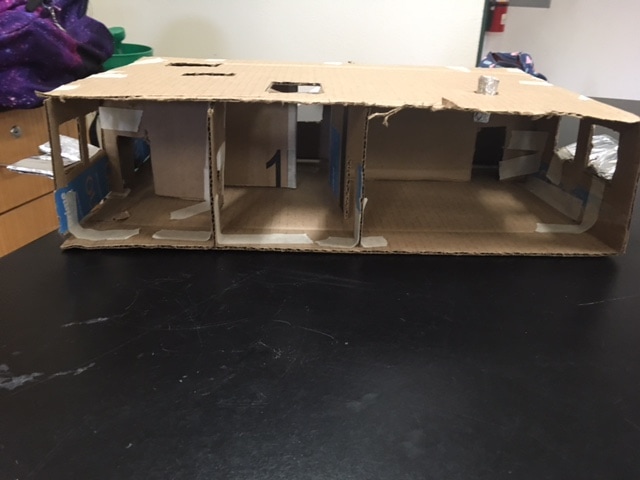
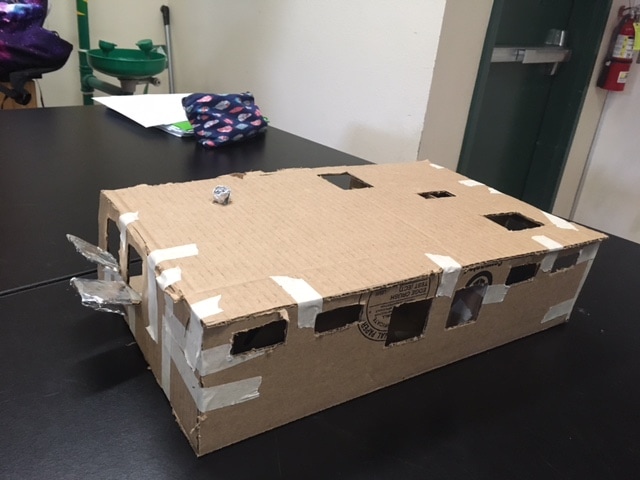
After we learned about the position of the sun at various times of the year we had to design a model house using different types of windows. The five types of windows we learned about were regular windows which do not have anything special about their design. Skylights are windows on the ceiling and give more direct sunlight. Solar tubes are spherical domes that sit on the roof; the light passing through the tube has a reflective lining which scatters the sunlight everywhere. Light shelves are reflective shelves that are placed above eye-level and have a high-reflective upper surface, which reflects daylight into a room. Clerestory windows are windows placed close to the roof to let in additional light in a given room. With this information on the different types of windows we had to make a basic 1,000-square-foot house that utilized these various types of windows. We made a to-scale representation of the house and by using a flashlight we were able to simulate different positions of the sun and we got to discover which windows worked the best for each area of the house.
East and North Wall (open wall)
|
North Wall
|
West and South Wall (long wall)
Framing and Blueprints
The final step before we designed our tiny house was that we had to learn how to frame a house so that our final report would be accurate. When framing a wall we learned several things when starting from the exterior wall to interior of the wall. We would need exterior paint which would determine how light and heat would be absorbed by the house, siding to protect the house from the elements, and tar paper to make the house water repellent. Additionally, we would need two-by-fours for framing to ensure that the house would be stable and will keep the walls perpendicular to the ground. In between the the two-by-fours we would need to have insulation to help regulate the interior temperature of the house, and drilled into the two-by fours would be sheets of plywood to add more support to the walls. Finally, we would have painted drywall to determine how much light and heat is absorbed into the walls. The framing for the roof would be the same except there would be shingles on the exterior roof instead of siding. The construction of the floors from the top to bottom would be determined by how much heat we would want our floor to absorb. If we chose tile we would need a metal mesh to hold the tile into place. If we were not going to use tile we would lay our floors onto sheets of plywood and the next layer would be two-by-eights to make sure the floor was stable and sturdy enough to hold the weight of the house. Then, in between the wood framing there would be insulation to help the house control its temperature, underneath the house there would be a wire mesh to hold the insulation in place, and, finally, there would be concrete foundation blocks to support the tiny house.
After multiple labs and tests, we finally started designing and planning our tiny house. Below you will be able to find the final blueprints of the house. We had to blueprint each wall so it would be easier to calculate the final cost. The house that we decided to design was a non-portable house located on the beach. The height of the roof at its tallest point is 16 feet. The outside walls of the house are 19 feet x 13 feet, since the walls are six inches thick the interior dimensions of the house are 18 feet x 12 feet. This means the first floor is 216-square feet and the loft is 170-square feet so, the total living area is 386-square feet which is plenty of room to fit four people. Our blueprint scale showed that every two squares equaled one foot and the bathroom blueprint scale was that every four squares equaled one foot. Below you can find all the blueprints we made for our tiny house.
After multiple labs and tests, we finally started designing and planning our tiny house. Below you will be able to find the final blueprints of the house. We had to blueprint each wall so it would be easier to calculate the final cost. The house that we decided to design was a non-portable house located on the beach. The height of the roof at its tallest point is 16 feet. The outside walls of the house are 19 feet x 13 feet, since the walls are six inches thick the interior dimensions of the house are 18 feet x 12 feet. This means the first floor is 216-square feet and the loft is 170-square feet so, the total living area is 386-square feet which is plenty of room to fit four people. Our blueprint scale showed that every two squares equaled one foot and the bathroom blueprint scale was that every four squares equaled one foot. Below you can find all the blueprints we made for our tiny house.
Budget
After we were done blueprinting each surface of the house we had to find out how much of each material we would theoretically need to build the tiny house that we designed. The goal of this project was to keep it as inexpensive as possible so it could be affordable by most people. The cost of the entire house is about $20,000. We had to check various websites to get the best prices, but we mainly found our materials from Home Depot. Below is our budget list.
| final_tiny_house_budget_list_-_sheet1.pdf |
This was our slide show
Energy Turbine Lab
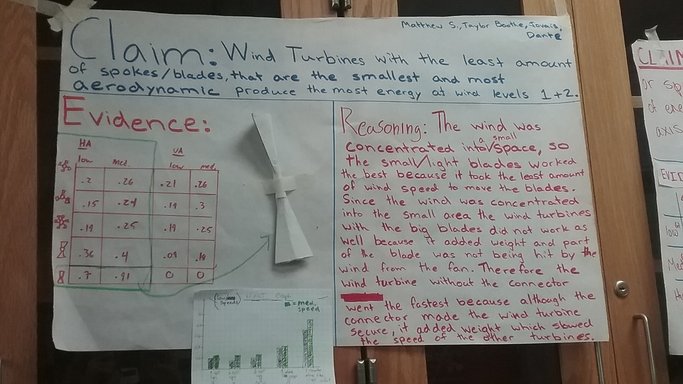
While we initially designed the tiny house to make it as efficient as possible, once we were done with the planning of it, we had to come up with a way to power it. In class we did a lab where we had to create wind turbine blades that did the most rotations with different wind speeds. In the lab we learned that horizontal blades were able to spin faster because they were able to catch more direct wind. The best blades were the ones that did not have a large base, but a very tiny base was beneficial because it did not add any unnecessary weight. The best design for a blade was one that was narrow at the bottom and wider at the top, making it aerodynamic so the wind could easily push past it, moving the blades. Additionally, the blade had to be angled so the wind could push past it.
This is our poster we made for our data from the lab.
This is our poster we made for our data from the lab.
Why would we want an environmentally-friendly house?
At the end of the project we did a justification about why it is beneficial to be energy efficient. In the document below there is a list of all possible energy sources and the pros and cons of each. After you are done reading this, we hope it opens your eyes about how we can change the world by simply re-thinking our choices of energy.
| energyjustification342017.pdf |
Reflection
Some peaks in this project was that I was able to lead my group and make sure we were on task. I was able to lead my group by making sure that everyone had an equal part in the project. We stayed on task by creating and meeting mini deadlines. Another peak of this project was that I learned a lot of valuable information, like how to frame a house and how to draw accurate blueprints all while learning about solar energy.
Some pits of this project was that I needed to make sure that everyone in my group understood the concepts before we moved on and we needed better teamwork. I discovered that if everyone was not initially up-to-speed on the task at hand, then I needed to stop and reexplain what we needed to do, which took more time than necessary. Even though we were productive we could have worked more efficiently as most of the time we worked independently as opposed to working as a group.
Some pits of this project was that I needed to make sure that everyone in my group understood the concepts before we moved on and we needed better teamwork. I discovered that if everyone was not initially up-to-speed on the task at hand, then I needed to stop and reexplain what we needed to do, which took more time than necessary. Even though we were productive we could have worked more efficiently as most of the time we worked independently as opposed to working as a group.
